
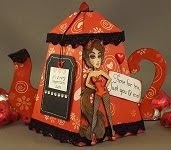
Interactive cards are fun to make and receive. I've seen some really nice pop-up cards and decided to give it a try. Easel cards are also fun to make and display (see my previous post here). Cards provide good surfaces for experimenting.
Keep in mind that I usually experiment by creating a "dud." My duds don't necessarily coordinate, they're full of imperfections and they're usually put together using scraps. I hang on to my duds for future reference so I can see where improvements can be made. This dud is almost gift worthy and definitely post-worthy.


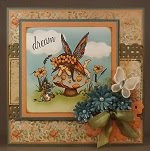
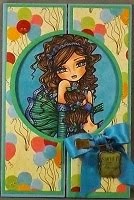
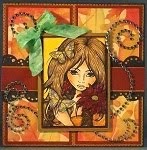
I picked up this Motivet fairy image at this week's Creating Keepsakes Convention in Valley Forge, PA and wanted to give her the spotlight. She's a little bigger than many of the nesting dies I have. I got most of her into the Spellbinders scalloped oval die but couldn't fit her wing inside. I placed the die over the image and pencil marked both sides of where the die met her wing. I cut around the part of her wing that extended beyond the die edge and cut a little further into the image so the die would slide under her wing. With her wing resting on top of the die's edge, I ran the image and die through my die cutting machine. Nice! I ran it through the machine again to emboss it. Oh, that's neat! You'll be seeing a lot more of that! It's a great effect that I've only done before using hand drawn templates.

I filled my fairy using B91, B95 and B97 to coordinate with the blue of my paper. I wanted to add some contrast and the opposite of blue is orange. My blues are very dark and dull so I tried to go for a peachy color and selected R12 for the butterfly wings. I used E53, E55 and E57 for her hair and pulled that into the butterfly's body and grounding at her feet. I used B000 to give her wings some transparency. B0000 with 0 gives a very soft, barely there, outline shadow.

I rarely use flowers on my projects. It's not that I don't like flowers, I do. It's just that someone once told me that if I make a mistake on a project, don't worry, just cover it up with a flower. So, many years later, whenever I see a project with flowers all over it, I immediately think that there's a big, messy mistake under the flowers. LOL!!! I prefer to find embellishments that are related to the subject of my project. Sometimes flowers are the most appropriate embellishment. I think this fairy with a butterfly should be amongst flowers.

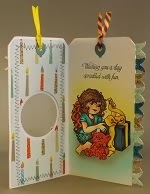
I've airbrushed Bazzill tropical and bachelor white flowers using R12 to match the peachy tone of my butterfly. I added a pearl to each layered flower for a little glam. The additional Petaloo flowers with rhinestones seemed to coordinate well enough so I just added them as they were. I added more to the inside sentiment with the hopes that they'll help to pull it all together.
The fairy and sayings are from Motivet stamps. Check 'em out! They have nice, big, open image stamps that are good for filling with Copic colors. Comment on their blog (here) for a chance to win weekly prizes.
I hope that I've been able to reinforce how using Copics allows perfect coordination for all elements of your projects.
I'm not sure that this card will make it to the dud pile. I have to pick it up, take another look and think about it again. LOL!!!


1 comment:
Very cool! Didn't see you there. Love going there every year.
Hugz, Z
Post a Comment